Learn How to Import OST to Windows Live Mail in Bulk?
“We are a consulting agency in Texas that needs to restore six OST files (15–22 GB each) from employees who left years ago. With no access to Outlook profiles, we are worried about the data access. As our current email client is Windows Live Mail, is there any feasible way to import OST emails to Windows Live Mail without loss?”
-Patricia Melone
Summary: Many professionals use Windows Live Mail and don’t have Outlook installed on their system. The fact is that Outlook data is locked inside some archived OSTs, which are only accessible with the original Outlook profile or Exchange account. On the other hand, Windows Live Mail only supports EML and MBOX formats. So, the real challenge is what if you don’t have an Outlook or Exchange profile, or it’s inaccessible? You need to import OST to Windows Live Mail, but that too how, since we can’t avoid the format incompatibility.
This guide explores some easy solutions and an advanced MacSonik OST to PST Converter Tool to complete the import in the simplest way possible without loss.
Need to Convert OST Files to Windows Live Mail
The general factors for which a user may be interested in saving .ost files in Windows Live Mail are:
- Access to unreadable OST data when Outlook or the Cache Exchange profile is inaccessible or lost.
- Windows Live Mail is a simple, easy-to-use, fast, and serverless email client, suitable for all.
- Restoring data from old legacy systems into a readable format accessible with multiple applications is essential.
- Windows Live Mail is ideal for all home users, students, IT teams, and others, unlike Outlook OSTs.
- Users often tend to save OST data in EML format for long-term storage and archival with no Outlook dependency.
Understanding these impactful reasons, the question of why imports must be clear. Proceed ahead to check out how to import OST emails to WLM in bulk with ease.
Classic Way to Import OST to Windows Live Mail
There is no direct way to upload OSTs securely into Windows Live Mail. However, you can convert OST to EML file and later upload it to WLM.
Key Note: An active Outlook profile is mandatory to perform this method.
The steps to import OST file to Windows Live Mail manually are:
- Start Outlook and from File, choose Open and Export.
- Then, opt for Import/Export and select Export to a File. Tap Next.
- Further, select PST and click Next to choose the OST folders to import from.
- After that, select the OST files and select to Include subfolders (optional). Tap Next.
- Now, click Browse to select a folder where you will save PSTs and click Finish.
- Once saved as PST, drag and drop individual emails into an external folder on the PC.
- Outlook automatically saves them as EML files. Later, open Windows Live Mail.
- Finally, click File and choose Import Messages → Windows Live Mail and click Browse to upload EMLs.
You have completed the process to move OST emails to Windows Live Mail for free successfully.
Shortfalls of the Manual Method:
- Not suitable for bulk or large OST migrations.
- The formatting and structure often break in the process.
- Cannot be performed without Outlook and technical skills.
Modern Way to Import OST to Windows Live Mail
If you need to move emails in bulk without losing data, folder structure, and addressing integrity issues. Then, use the MacSonik OST Converter Tool. It is a beneficial option for this migration because:
- Directly saves OST files in Windows Live Mail through IMAP or downloads them as EML files.
- Offers secure bulk migrations without any size limitations and handles attachments too.
- Removes duplicates, enables preview, and offers a date filter for selective conversion, among other unique features.
- Allows to evaluate the tool’s performance and free import upto 50 emails per folder with the Demo Version.
- Facilitates a One-Time Service by the technical experts to perform the import without software installation and manual hassle.
Steps to Convert OST Files to Windows Live Mail
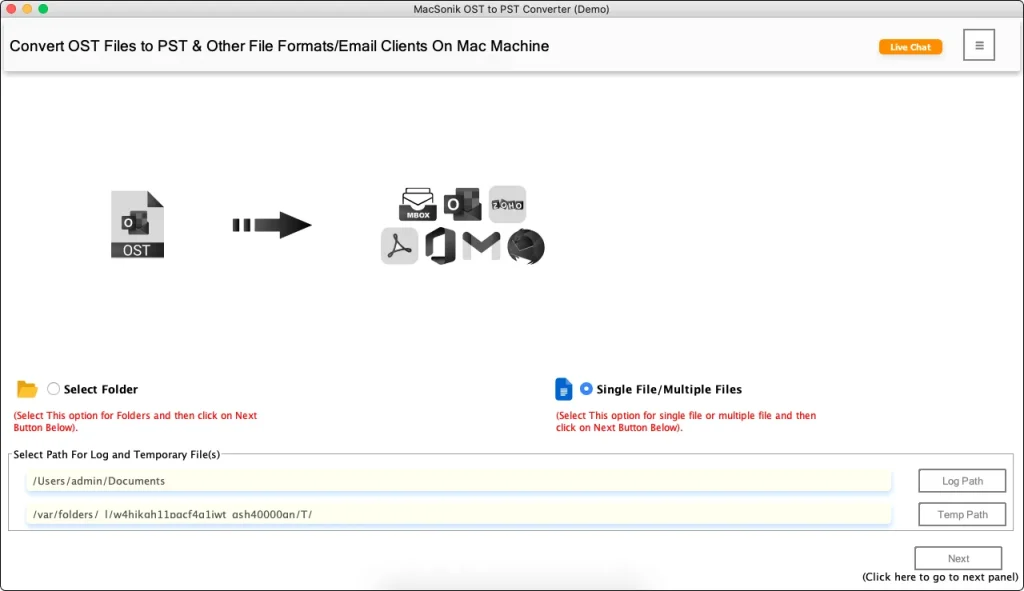
- Launch the OST File Converter on your OS and click Next.
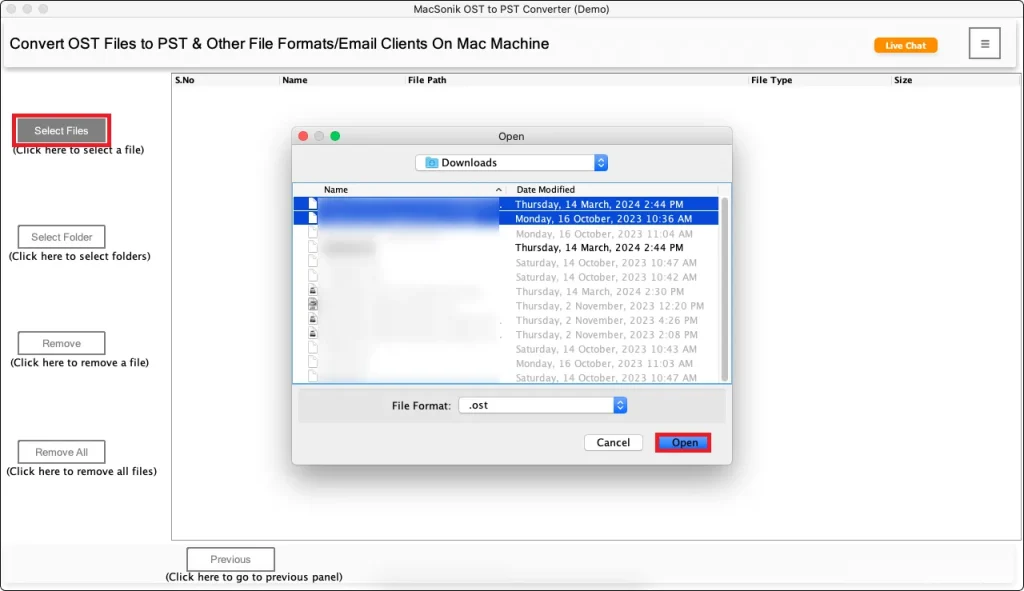
- Then, choose the OST files from the PC and upload them. Tap Next.
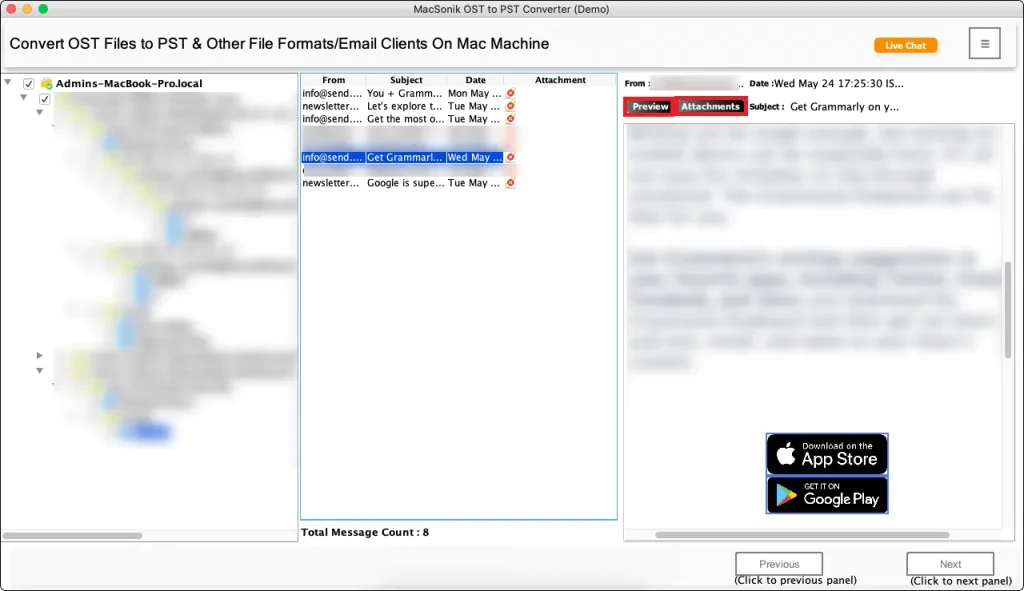
- Further, preview the data and attachments and select folders. Click Next.
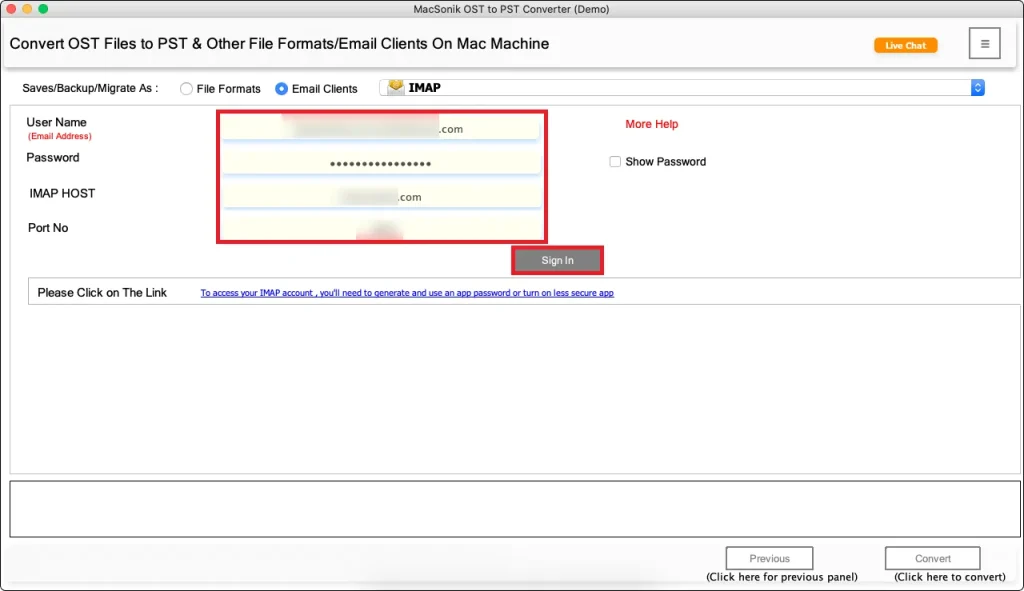
- Afterward, select EML from file formats or IMAP from email clients.
- Pick a destination to save or sign in to WLM, apply filters, and finally, press Convert.
 <
<

Note: If you save files as EML, then complete the process to import OST file to Windows Live Mail by uploading EMLs. Use the WLM “Import Messages” option as done in the manual method (step 8).
Pro Tip: With this method, you do not require the MS Outlook installation.
Conclusion
The task to import OST to Windows Live Mail becomes straightforward once you convert OST to EML. The manual import for this only work if you have an active Outlook profile and a few small-sized OSTs. For large ones and bulk imports without Outlook, using the professional OST to PST Conversion Tool is the optimal solution. It provides accuracy, guaranteed import without loss, and data preservation with no effort and time wastage.
Frequently Asked Questions
Ans. Use the excellent OST Converter to move your old legacy OST emails directly into Windows Live Mail without trouble.
Ans. Importing manually may affect the attachments and they may not move correctly. Instead, use the OST to Windows Live Mail Import Tool for a quick, secure, and hassle-free import of OST emails with attachments.
Ans. The best automated solution is the MacSonik OST to PST Converter, which has unique advanced filters, is easy to use, and works on both Mac and Windows OS.
Related Post